Unfortunately, I am absolutely useless at nalbinding, as I might have mentioned earlier, so I was thrilled when Ane offered me this wonderful guide for posting. Translating it from Danish has given me new hope that I might one day be able to master this craft too with some help from Ane.
Ane Løser has recently begun studying at The School of the Association of Friends of Textile Art (HV School) in Stockholm, Sweden and has also begun blogging on Ane's Form (in Danish). All the images in this post are copyright of Ane Løser so please seek her permission if you wish to use them further.
Let's get on with the nalbinding shall we.
Take care,
Eddie
P.S. If you want to follow the guide on Flickr instead the images with instructions are in this set!
---- . ---- . ---- . ---- . ---- . ---- . ---- . ---- . ----
Here is a little demonstration of how to do nalbinding. There are several different techniques and I will just show one here. I will demonstrate using black wool so that everything I do stands out more on the pictures, but it is difficult to photograph as everything happens in a flow. I can also recommend checking on youtube for some good tutorial videos.
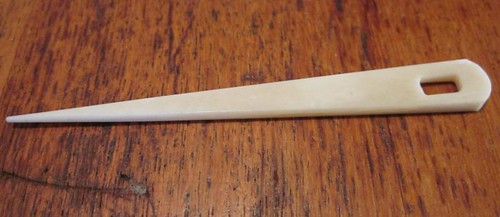
Above is shown a typical nalbinding needle. In this how-to I am using one that I bought in Stockholm. It is too large and coarse and I actually prefer using an ordinary darning needle. If you feel that you can't do nalbinding without a proper nalbinding needle, you can buy one at most Viking related museums or on the Internet. Otherwise they are available at most Medieval/Viking markets. As for yarn, pure wool is absolutely the best to start with. Use plain knitting yarn to begin with and you can always experiment later with other yarn. Also small remnants are great to use for this.
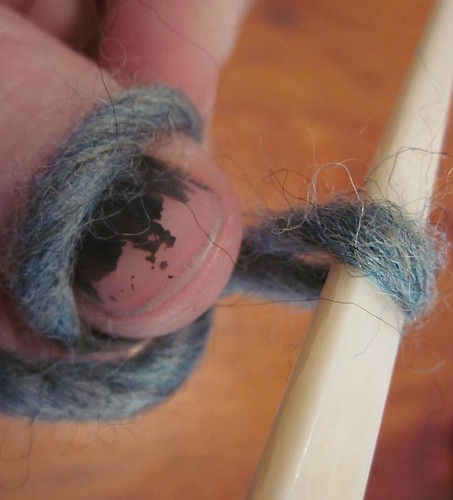
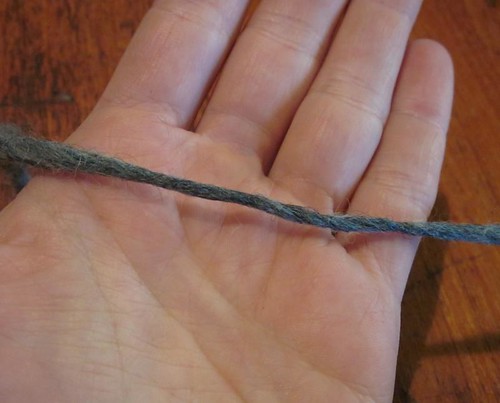
Pull, but do not cut a piece of yarn about 1.5 meters long. At one end you do a two half-hitch knot like above.
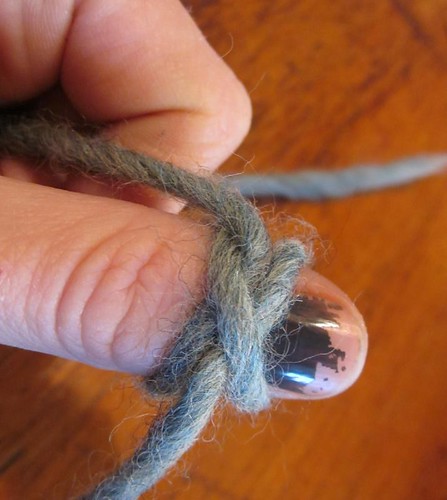
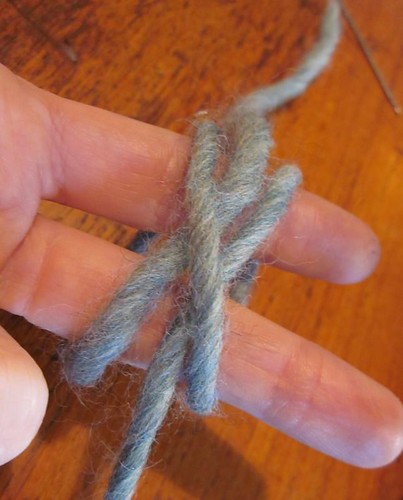
Place it around your left thumb, with the shortest end inside the hand. At the long end sits the needle which you keep in your right hand.
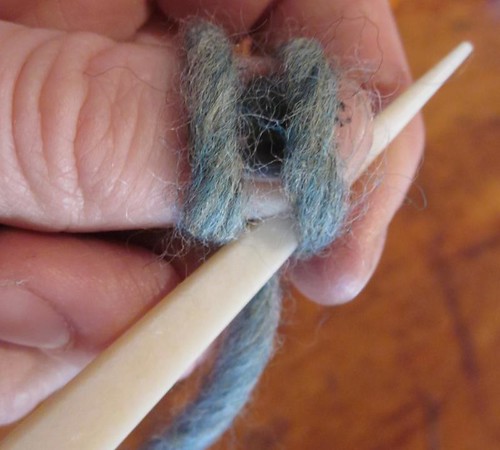
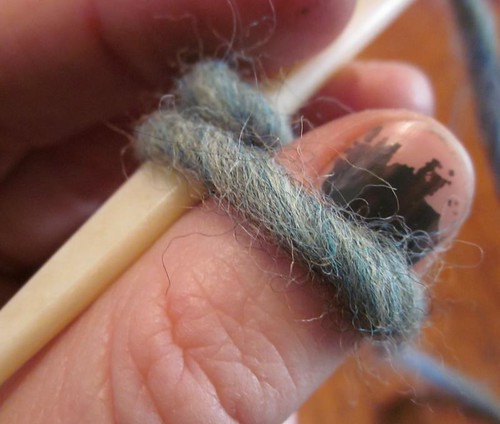
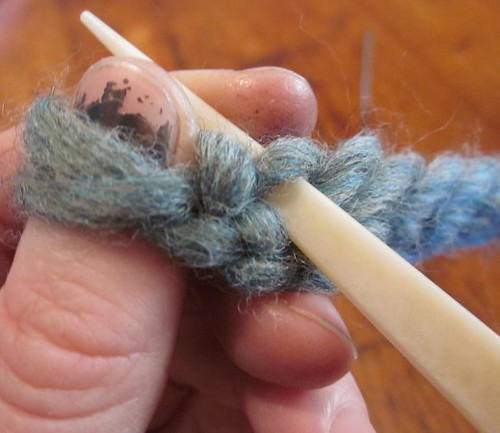
Now place the "knot" on the inside of your thumb. Now you have two threads above the nail. Take the needle between the two threads and let the needle tip come out as in the picture.
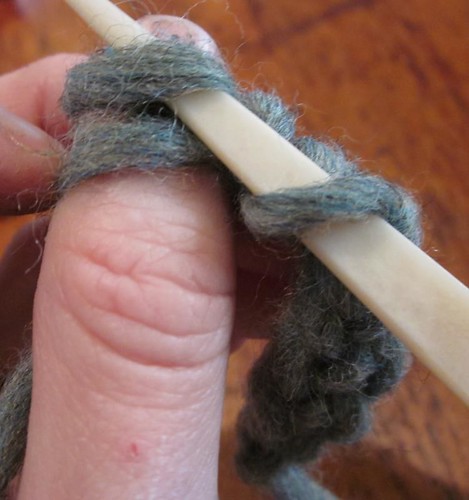
Lift the upper loop off the finger.
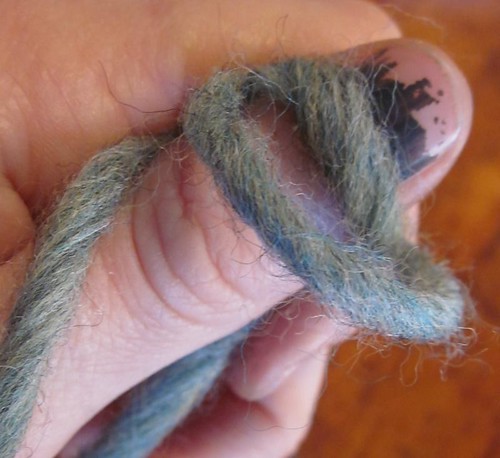
Take your right hand and move it anticlockwise, so the yarn twists around and you can put the needle tip down between the thread is still attached to the thumb.
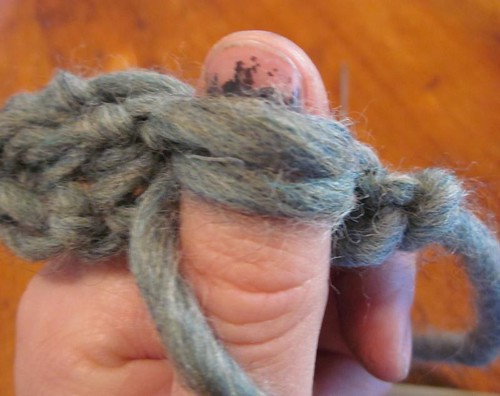
Now that we have done this, here is the result. Now pull the thread through and while doing so let the thread loop around your thumb under the thread already there.
This means that the loop that was below before is now above and the loop that is now below is the one connected to the needle.
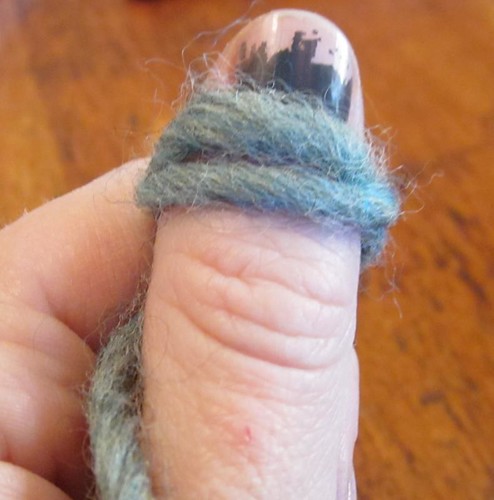
Now we are back to square one and then we start all over again.

Once we've done this a few times will have a row of stitches hanging off the back of the thumb. This is the beginning whether you want to make socks, mittens, or maybe a sweater. Constructing nalbinding items is a lot like crochet, you work around and around and when you want to make wider pieces and not just long, thin row you link the row with itself.
Let's try this out! Begin by sticking your needle through the stitch closest to your thumb.
Now we need to do as we did in the beginning, pretend the extra stitch on the needle doesn't exist and follow the instructions from the start.

Now you will get a corner because we are working along the row of stitches. If you continue to work round and around without increasing or decreasing, you will get a flat pouch. If you for example want to make mittens or socks you will of course be compelled to increase and decrease. Both mittens and socks can be made as either toe/fingers up or cuff-down. I prefer to do toe-up. That is what I will demonstrate here, but if you prefer the other way you just need to make a long row that fits the arm or leg that can be linked as a ring instead of increasing from the tip.
To increase and decrease: this is again the same as with crochet. When you increase you stick the thread through the same stitch one or more times and when you want to decrease you just miss a stitch in the previous row. When making mittens and socks it is best if you increase in the corners so that the increase sits on the inside and outside of the foot or along the first or the forth finger. Practice this before you begin making a big sweater. Remember that you should only increase and decrease a little in each round and not all in one go. Another thing I do is to make both socks or mittens at the same time. This way you can work without a pattern and still get two identical items where increase and decrease are the same on both.
To extend your yarn: Take the end of the old yarn and split into two or more. Do the same to the new thread you've torn off. We need to felt the two threads together. The fibers sticks much better together when they are long. This is why we tear new yarn instead of cutting.

Interlink the threads and make them wet.
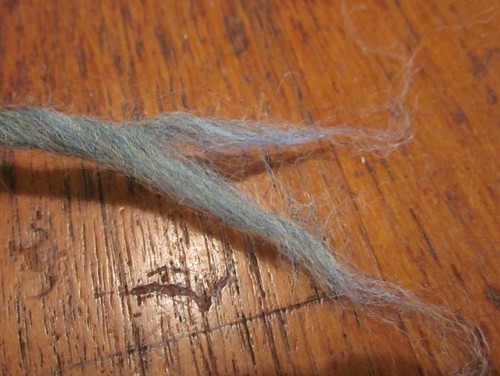
Now the threads are very loosely connected, but when we roll the wet thread in our hands we felt it together and the threads are now as one thread.
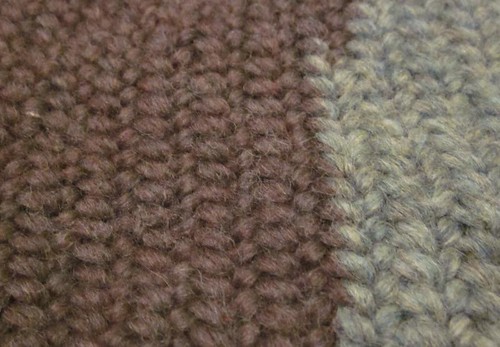
On this picture you can see the transition between two colours where I have felted a blue thread to a brown.

Here you see a heal where I have decreased.

Here you see a toe where I have increased.

Here is the heal from underneath. I made a tube which fits the foot until I reach the middle of the instep. Now I make a row that goes out from the rest of my tube, which is done by not connecting with the tube, but instead going back to the very first step of this how-to. When I made it long enough I connected it to itself and finally back onto the tube. Each time I go around, I decrease at the root and the top of the row sticking out.
This is the end of my nalbinding guide. Please let me know if something is completely incomprehensible or if you have any problems. Nalbinding is not difficult, but you have to learn it, as with everything else. The story behind the nalbinding goes way back. Fragments of nalbound textiles have been found in Israel dating back 65000 years, but this is a story that must wait for another time. Good luck and let me know how it goes!
A fascinating archaic art form. I am so excited to learn it and teach it to all my friends! Thank you for this guide.
ReplyDeleteThe wool to use in Nålebinding is thin as stockingwool today. You cannot sew broad stitchrows using your thumb as meassure. See my www. Helse-pilogplanter.dk
ReplyDeleteMarianne Overby, Hadsten, Denmark
Thank you for your comment Marianne. I don't personally do nålbinding but it seems that Ane has been nålbinding with thicker yarn than sock yarn. But I guess you are right if you do use sock yarn you can't use your thumb as a meassure.
ReplyDeleteBest Eddie
This comment has been removed by a blog administrator.
ReplyDeleteI think, maybe, you mean 6,500 years, not 65,000.
ReplyDeletefantastic just the info I was looking for. Am now off to give it a go!
ReplyDeleteNalbinding is known from 6,500 BCE, so that's 8,500 years ago.
ReplyDeleteThis doesn't appear to be true nalbinding, which I've always known to 'spiral' around, as demonstrated in this video...
ReplyDeletehttps://www.youtube.com/watch?v=CB48zYS-NWA
Interesting stitch, I have never seen that variety before. It's kind of like a magic loop for nålbindning. And she does not use her thumb, I was just wondering (after the comment above) about how you can keep track of the thread without using your thumb. Cool!
DeleteI have always done the needlebinding as it is tought on this site, but you can construct your garment basically any way you like that allows you to place your stitches. Considering that it has been around for so long there are really a lot of different varieties.
But you don't get rid of the hole in the middle of the loop? That seems... impractical.
Deletecomo eu gostaria de aprender.Já tentei...mas não é pra mim.
ReplyDeleteTusen takk! Jag fattade inte hur man vänder innan!
ReplyDelete>Anonymous:
Needle-binding has about a thousand different possible stitch types and you can spiral stitches or sew them together as you please. Because mittens, hats, and sock toes can start with a spiral and because those are what people are probably making, many tutorials (in English anyway - not in Scandinavian that I have noticed) teach you the spiral as if it were the first step. "True" needle-binding is about the method used to create the stitches in general, it has nothing to do with if the work spirals or not.
I'm new to Nalbinding after joining a living history group recently. I've had some success with the Oslo stitch and am in the process of making a pair of socks using the Mammen stitch.
ReplyDeleteI had one question for you as, shamefully, I have had to knot the end of the wool when I finish the piece I am working on. I feel as though there must be a more authentic way to start and end a project than by knotting the last piece of thread and cutting the end to tidy it. What am I missing? Is this the most accepted way, or is there another method of joining the end of the thread back into the main project, as you do when felting on a new piece of thread [or something else I haven't thought of]?
You can splice it (spit join described in the artcle above) or some people say use a Russian join. If you're using wool the spit join is ideal, and there are no knots with that.
DeleteI would imagine it is the same as crochef. Instead of knots, you leave a long tail, and then weave in the ends back into the main piece. I usually weave through 5-6 stitches, and loop over and weave back the same amount of stitches. I've found it always secures itself in that way.
DeleteHow do you keep track of rounds when nalbinding in the round? Any tips?
ReplyDeleteRespect and I have a dandy provide: Whole Home Renovation Cost home remodeling companies near me
ReplyDeleteLoved the way you explained everything.
ReplyDelete