Pages

Showing posts with label Craft. Show all posts

Wednesday, 26 January 2011

Why bobbin lace fascinates me?

Bobbin lace is a craft that can be said to have gone out of fashion. This seems to have happened at the same time as the industrial revolution in the Edwardian period; a subject that has been covered recently both in the TV series, Edwardian Farm (BBC2) and the TV drama “Larkrise to Candleford” (BBC1). In the latter, Queenie goes off to Banbury Fair to sell her year's work of lace, but returns home very downhearted because the fashion has turned towards machine woven lace instead.

Making lace, as I learned while reviewing the Edwardian farm book, was already a time-consuming and not very well paid job to begin with. Queenie on the other hand reminisces on the social aspect of lace making where all the village's women and girls would be working side by side every day to produce lace to sell.


Ruth Goodman explains how hard a job it was. Lace was usually sold through a dealer and the woman who produced the lace received a pittance in comparison to the price that a shop would receive when selling the lace to the customer.

Nevertheless, it was a source of income and could be quite an important one to a poor family in the countryside. To see this source of income taken away and to be replaced by machines must have been devastating. It must have been equally as hard to see a craft so widespread nearly disappear altogether.

Other crafts seem to have had a revival over the last 20 years; knitting and sewing probably being some of the most popular and well known. But not lace, yet!

Is it more difficult to do? I don’t think so. Do you need more equipment and space? No more so than sewing. So why did the craft of making bobbin lace never really come into fashion again when others like knitting and sewing did?

I think that to answer this question we must look at the relationship between craftsperson and consumer. With knitting and sewing the craftsperson and the consumer can be the same person. After the industrial revolution there would still be people who knitted socks and sewed dresses for themselves mostly because they couldn’t afford the machine-made items. Knitting and sewing produce necessities that, if you can’t afford to buy, you then have to learn to make yourself. Whereas lace was always very much a luxury product. The craftsperson and the consumer of lace would not usually be the same person. So when handmade lace went out of fashion and there was less chance of selling it, there might not have been much point in producing it. A piece of lace is a luxury item and to spend your working hours producing it for your own pleasure is a luxury that few could afford.

Having said all this let's not think lace is all doomed. Let's rejoice instead that there were people for whom handmade lace was still valuable and who could afford to buy it. Ruth mentions that the Royal family especially, made a point of buying Honiton lace.

There are still quite a few lace makers around today. Some of them prefer traditional styles and some push the boundaries and produce very modern and exciting pieces. Since more and more of us today are able to spend time crafting for our own pleasure I want to encourage everyone to consider lace again. It may look complicated but it really isn’t, I promise!


What do you feel about lace? Does it look complicated? Are you unsure about what you would use it for?

Furthermore, I am looking for lace-makers to portray. If you know anyone or if you have pictures of a relative who made lace – please do get in touch. I’m very interested.

I have myself dabbled a bit with bobbin lace and found it very satisfying. Please feel free to comment on some of my work on Grey Duckling. It might not be to your taste but it was fun to make.

So to answer the question I posed in the title; Why Bobbin Lace fascinates me? I think it is a combination of being able to create such beautiful delicate items and the fact that it isn't that popular a craft anymore. It makes me want to shout from the rooftops 'come and try!'

The images in this post are copyright of Eddie Roued-Cunliffe. You are hereby granted permission to use them for non-commercial purposes as long as you credit Eddie and link back to this page. If you are using them and talking about this post I would love to hear from you in the comments.

Help for the echo flower shawl

In the beginning of January we started the Echo Flower shawl knit-along (KAL) on Ravelry. It's been really fun but along the way we noticed that some notice shawl knitters (Eddie included) were having trouble understanding the construction of a triangular shawl.

Shawl construction
We have tried making a drawing of the construction of the Echo Flower shawl to help you visualise how the shawl is worked.

Historic Crafts Echo Flower construction
Echo flower shawl construction (copyright Historic Crafts)


  • You basically begin the shawl in the middle of the long side (upper border) of the triangle (pink on the drawing) by making a garter stitch rectangle. For more on starting a triangular shawl have a look at Damp City Knits post on the Garter Tab Cast on. This leaves you with 11 stitches (3 on each side and 5 on the long edge).

  • This rectangular garter stitch tab is also the beginning of the garter stitch top border (green on the drawing) which you work by knitting the 3 stitches at the start and end of each row. These are not on any of the charts but remember to work them for the whole shawl.

  • The remaining 5 stitches from the long edge of the rectangle are used for the setup chart (blue). The setup chart is only worked once and includes the center stitch. Putting in a stitch marker before it help you keep track of it.

  • The flower chart (purple) makes the body of the shawl. This chart needs to be worked once on each side of the center stitch. So you work border stitches - flower chart - center stitch - flower chart - border stitches. You repeat the flower chart 8 times for the shoulderette and 13 times for the shawl.

  • The border charts (1-3) (yellow) are worked in the order they are numbered. The center stitch is erased and becomes part of chart 2.

  • Finally the edge chart (teal) is worked once continually across the whole body of the shawl.

2 into 9 stitch
There has also been a bit of confusion about how to work the 2 into 9 and 3 into 9 stitches. We have made a little video showing how to do this. The important thing here is to keep the stitches loose.


The image and video in this post are copyright of Historic Crafts. You are hereby granted permission to use them for non-commercial purposes as long as you credit Historic Crafts and link back to this page. If you are using them and talking about this post I would love to hear from you in the comments.

Saturday, 27 November 2010

Felting

The translation of this great introduction into felt-making by Ane from Anes Form is long overdue. But it's here now and you can use it to make other things not related to Easter. How about a hat to keep you warm this winter or come December you could make some Christmas baubles.

In order to felt wool three criteria need to be fulfilled: heat, water and movement. This is the reason you will find your favorite shirt come out of the washing machine in a size that would fit a nine-year-old, while it has become thick and hard. In this situation felting might not appear as something you would like to experience again, but don't let this put you off. This process can be used to create the most amazing things. In fact only your imagination limits you, since the thickness of the material can be varied infinitely and thus create an infinite number of beautiful items.

The actual felting process is simple - the problem is to make the wool felt in the shape you need! This requires some practice, but if you note down what happens to the wool during the felting process you will soon get a hang of it. However, I recommend attending a crash course, so as not to lose heart completely. Many aspects are difficult to explain and it is something one learns best by trial and error or watching someone else do it.

There are three different methods depending on what you want to achieve. You can felt a solid, hollow or flat piece, and the flat method is really just a simplification of the hollow felting method. As Easter is approaching, I plan to incorporate these three methods in an Easter hen and it's eggs. The solid method is used for the eggs and the hollow is used for the chicken. I recommend that you begin by making a flat piece of felt first to get a hang of it and then felt the solid eggs in the end, when you have mastered the other two methods. The hollow filter method is often used when making hats, shoes, mittens, etc.

During the the felting process your subject will shrink. Think about it when you prepare the dry wool, which therefore must be larger than the finished article. For shoes and similar items you need to make a felted sample to get the right size. I have written a bit more about this at the end of the tutorial.


You need:

  • Wool (wool tops)

  • Green or brown soap

  • Warm water (not warmer than you can still keep your hands comfortably in it)

  • Dishcloths and possibley a towel

  • Felting needle (a special needle with barbs, are sold in hobby-shops and by most carded wool traders)

  • A table top that can withstand water, with an edge or the second drain option

Solid felting / the eggs

Take a suitable piece of wool top, and tie a firm knot in the middle of it. Let the wool top run around the knot, while keeping the oval shape of the egg. Remember not to twist the wool, as it will just become harder to felt. When you get to the last little bit of wool, you can pull the fibers out and let them lie around the egg so that you do not see the transition and the wool then sticks to itself. Now you should have an oval shape which is relatively firm.

Now you make the soapy water. The warm water mixed with an appropriate amount of soap. The water must feel slightly greasy when you rub your hands in it. If you have overdosed, wool can take longer to felt. If you underdosed the wool will create a halo on the object you are felting. Experiment!


Put the egg into the water and take it in your hand, making small movements on the ball which gently affect the wool. Throughout the process the ball stays under water. After a time you will notice that the ball will have a firmer shape and the more firm the egg appears, the harder you can work on it. And finally: Voila! Your first felted egg is ready to be embroidered.

Flat felting / hollow felting / hen

Before you begin your hen project I recommend trying to make a flat piece of felt. This gives you a feeling of flat felted objects before you begin with the larger project. Put your wool into a relatively thick layer so you can not feel the table through the layer. It should be equally thick all over and needs no trimmed edges.

Make some more soapy water as above and this time pour the water over your layer of wool. Pour the water out over your hand and then onto the wool, thus avoiding making a hard beam of water making holes in your woolen layer. The wool must be drenched, push a little cautiously to make sure that there are no air bubbles in the wool. During the process you can reheat the water if it gets too cold.

Now put your hands onto the wool and start moving them gently in small circles until the wool begins to felt. When you feel that the surface begins to close together, you may be more rough and when it emerges as a sturdy piece of fabric you can throw the felt down onto the table to make the process to go faster. You should now have created a coherent piece of fabric, and when you have it is time to move on to the chicken.

Draw a bird on your plastic piece (bubble wrap is excellent), and cut it out.

Now make two identical layers of wool tops of a suitable thickness, make sure that the pieces are five to seven centimeters larger than your plastic hen shape. Put one in a dry place, the other on your felt table with the plastic hen shape on top.


Put your finger on the edge of the plastic and pour a bit of water over the plastic. This will run off the plastic and give you a silhouette of the drawn hen. Now take the plastic away and make the hen wet in the same way that you did with your flat felt piece above. The result should be a very wet hen with a dry aura.

Put the plastic hen back on top again and bend the dry wool aura in over the plastic.


Pick up the second dry wool layer and place it on top of the wet plastic hen. Bend the dry layers aura in under the wet hen and wrap it tightly but make sure to maintain the hen shape.


Time to felt! Make the whole hen wet with soapy water. Be careful in the beginning, but as before, the more firm the surface is, the harder you can work on it. Remember to get around the whole object, also at the edges.

Once the felt on one side is firm enough and you can lift your hen easily without wool slipping, you can turn it over and repeat the process on the opposite side of the hen.

Now cut open the hen. This is done simply by letting it lie on the table when you cut. The wool inside the hen has not felted yet, so be a little careful. Take the plastic hen out and let your hand slip into the cavity, while the hen stays flat on the table.

When the hen begins to feel firm and the surface is properly sealed, you can begin to throw it onto the table so that it felts faster. Remember however to smooth it out often and throw it at different angles, otherwise you lose your nice hen form. When you think it is felted through and through, lay it out flat and fill it out with wool to make it round and hen-shaped. Trim the bottom edge so that it is neat. You can either sew the bottom up or sew a small piece of fabric in as an inner pocket for the Easter eggs. Let it dry. Once this is done, it is time to finalize it, by making a comb, eyes, and a beak. This is best done with needle felting.


Help and additional tips:

  • Wet felt can be stored for up to a week in the fridge if you are not ready to use it right away. Put it in a plastic bag with a knot in and the water which naturally comes with your project when it is lifted into the bag.

  • Felt-test: if you need to do something which must have a specific size you are best off doing a filter sample first. Place a suitable layer of lets say 10 x 10 centimeters, which you then felt. When it is done and dry, you measure your end result size, which helps you to figure out how big your plastic template needs to be to get a specific finished size. Different wools have different shrinking percentages, therefore you should always make a new sample for each new type of wool you are using.

  • Holes in the felt can be addressed by adding a thicker layer of wool top. If a hole occurs, stop the process, put dry wool on top of the hole and let the fibers spread over a larger area. You can try to use a felting needle to get the new wool to stick as it is difficult to felt wet and dry wool together.

  • If your wool begins to wrinkle or small waves appear on your yet to be felted wool, you have probably been too hard or working too much in one direction. If this occurs, work along them and not across them, as this will just make the waves larger.

  • It is never too late! Wool is a great medium and failed projects can always be used for something other than what was intended.

The images in this post are copyright of Ane from Anes Form . If you wish to use the images please request permission from Ane.

Monday, 1 November 2010

Berry dyeing: a dying craft or a fun activity

Let's talk about dyeing with berries and whether this is a craft about to die out or whether it deserves a comeback as a fun activity to do with friends and family that will bring you all closer to nature. Throughout, I will add some tips and tricks on how to get started with this fascinating craft.

How it all began

If you have ever eaten any type of berry you will know that most of them contain substantial dye powers. A run-away strawberry on your new blouse or a bit of blackberry crumble on your favorite trousers. Not a good combination. Nevertheless, it will probably give you an idea of how dyeing with berries could have been discovered.
Dyeing is known to date back to before 2600 BCE where we have the first known written record of dyeing in a Chinese manuscript. Up until 1856 dyeing was all done with natural products like roots and berries. This all changed when William Henry Perkin discovered the first synthetic dye. Out went natural dyes and in came synthetic ones instead. Having said that, the knowledge of dyeing with natural dyes was not lost entirely. Natural dyes will have kept a place among people who either couldn't afford synthetic dyes or who wanted to continue using natural dyes for aesthetic reasons. There is a different quality to the colours gained through natural dyes - no two batches are ever the same and even the same item may have varied colours. If this is the effect you are looking for, natural dyes is just your thing. In these days of eco-consciousness and neo-craftism dyeing with natural dyes has also found a new niche. Say your white organic cotton blouse has gone dull grey - what better way to spice it up than to pop it in a bath of blackberry or onion skin dye.

All natural colours
Dyeing with berries often gives a variety of purple colours, though reds, greens and browns often occur too. I have personally tried dyeing with Blackberries and Elderberries, both resulting in lovely shades of purple. As do Raspberries, Mulberries, Blueberries, Pokeweed berries and Huckleberries while Strawberries and Lingonberries give a more pink shade. Elderberries are also known to dye a blue/green colour when using the mordant Alum. Ivy berries are known to give a grey/green colour and Privet berries give green/scarlet colours. Scottish berries Bearberry and Blaeberry result in varying colours depending on the mordant used. Juniper berries give a shade of brown.

[caption id="attachment_2715" align="aligncenter" width="500" caption="Eddie's berry dyeing experiments. Elderberry (left) and Blackberry (right)"][/caption]

The mordant effect

A mordant is a substance that can be used to fix the dye to the fibre, yarn or fabric being dyed. While most berries are what is called a direct dye, meaning that they don't necessarily need a mordant to dye, they are also not light or wash fast on their own. A mordant or fixer helps make the dye keep better on the item you are dying. The most used mordant among natural dyers these days seems to be Alum (aluminium potassium sulphate). It is seen as the safest mordant and will give the dye a brighter colour. But it is not as light fast as other mordants which include: Chrome, Copper, Iron, and Tin. Some mordants are poisonous so I would check up on this and take precautions before using them.

There is also another option but I am not sure if they can actually be called mordants. It is also possible to use salt (for berries) or vinegar (for plants) as a fixative. Pioneer Thinking gives further instructions on how to use these. For my own attempts at dyeing with berries I used salt as a fixative and it worked really well. The only issue being that the result is not as light fast as using some of the stronger mordants.

Experiment

[caption id="attachment_2529" align="alignleft" width="300" caption="Elderberry dye soup"]Elderberry dye soup[/caption]

If you are the type who likes experimenting and making up your unique items natural dyeing is really something for you. You can mix and match and make up your own new colours. The advantage of using berries is great too as they are often easy to access. Go forth and raid a hedgerow. Although, here I feel I should also add a couple of words of warning. If you use wild berries you should be conscious of leaving some for wildlife and not ruining the plant with your raid. Also I would like to add that whatever berry you decide to use do check the safety precautions. Some berries are poisonous to eat and I don't know the effect when you cook them for dyeing. For health and safety reasons I will also just add that when you dye you should really use dedicated utensils that will not be used for cooking afterwards.

Having said that, there are great opportunities to try this out in a safe way with children around. Use raspberries or strawberries and salt as a fixer and you should be pretty safe. I think dyeing with berries is a fascinating activity that everyone should give a go at least once.

References

Druding, Susan. 1982, List of the History of Dyeing.

Fraser, Jean. 1983, Traditional Scottish Dyes. Canongate.

Hardman, Judy and Sally Pinhey. 2009, [amazon ASIN="1847971008"]Natural Dyes[/amazon]. The Crowood Press


The images in this post are copyright of Eddie Roued-Cunliffe. You are hereby granted permission to use them for non-commercial purposes as long as you credit Eddie and link back to this page. If you are using them and talking about this post I would love to hear from you in the comments.

Friday, 29 October 2010

A recipe for knitted flowers

[caption id="attachment_2628" align="aligncenter" width="459" caption="Flower brooch, copyright Ingrid Murnane"][/caption]

In order to make your own knitted flower, you'll need to knit a long strip of fabric, which is wider on one of the long sides than the other. From this you can form either a single rose-type flower, or a double flower. Even within these parameters there is scope for putting them together in differing ways to make tightly-furled or more blowsy blooms.

Of course, you might need a leaf too, which is a little more complicated so I'll give you a few links at the end for making different types.

Recipe for a flower brooch

The basic recipe for making a flower is as follows, but you can jig it about as you like for different effects, much like a cooking recipe:

  1. Cast on 80 to 100 stitches

  2. Knit three rows of garter stitch.

  3. Next row: P2tog all the way accross

  4. Next row: Knit and decrease (by k2tog every 5 or 6 stitches)

  5. Work in stocking stitch from here on, and on every second row (which will be a knit row) decrease by k2tog at appropriate intervals to pull in the work until your flower is almost tall enough for a brooch (I aim for about 5-6cm usually).

  6. Next row - k2tog right along the row, in order to halve the amount of stitches.

  7. Cast off.


Tip: It is up to you how you'd like to decrease. You can do it in a uniform fashion by decreasing first every 7 stitches, then every 6 and so on, or you could decrease by k2tog every 4 in the first decrease row, then by every 2 in the next, but every 5 in the third decrease row.  Of course, your decrease rows don't have to be every second row either. By playing with the decreasing and how often you space it, you will create differently shaped flowers.

[caption id="attachment_2629" align="aligncenter" width="457" caption="Rose brooch, copyright Ingrid Murnane"][/caption]

Putting it all together

Wrap the knitting around on itself to find how it sits best and for the appropriate flower look for you. Sew it into place using the tails of yarn from the knitting.

Of course, you might like to make a leaf to go with your flower. There are some great patterns available online for this. Here is a good pattern from Crafty Galore. This second one from TikkunArts is a pdf.

You can make them into brooches by adding a safety pin to the back, add them to cardigans or bags, or maybe make a garland!

The knitted flower recipe above is copyrighted to Ingrid Murnane. You are welcome to make it, talk about it and link to it, but when you do please attribute Ingrid Murnane. We ask however that you do not reproduce the recipe itself or use the recipe or the finished flowers for commercial purposes. The images are also copyright of Ingrid Murnane. Please contact Ingrid if you wish to use them for any purpose.

Wednesday, 13 October 2010

Fibres: Black Welsh Mountain Sheep

[caption id="attachment_2608" align="alignright" width="262" caption="Black Welsh Mountain fibres, spun and knitted"][/caption]

In Medieval times, black wool, known as 'Cochddu' (reddish brown) was much sought-after by merchants. In the 19th century Welsh flockmasters recognised the commercial potential of the black lambs and began to select and breed them carefully to produce a pure and separate strain of Black Welsh Mountain Sheep.
Black Welsh Mountain sheep are small, the ewes are polled and the rams are horned.

Working with Black Welsh Mountain Fibres
The fleece is fairly coarse and is sought after for it's natural black colour. I just bought a bag with a friend this Sunday and I can't wait to have a go at spinning it.

Organisations:
Black Welsh Mountain Sheep Breeders' Association - UK

The images in this post are copyright of Eddie Roued-Cunliffe. You are hereby granted permission to use them for non-commercial purposes as long as you credit Eddie and link back to this page. If you are using them and talking about this post I would love to hear from you in the comments.

Wednesday, 29 September 2010

Dyeing with Elderberries

[caption id="attachment_2529" align="aligncenter" width="456" caption="Elderberry dye soup"]Elderberry dye soup[/caption]

The Elberberries were out in full bloom a couple of weeks ago and I decided that it was time to try some more berry dyeing. I still didn't have a regular mordant like Alum so once again I turned to the tutorial 'Making Natural Dyes from Plants' for their instructions on using salt as a mordant. I had a go with the same wool I used last time for the Blackberry dyeing and I am at the moment knitting up some berry socks by making stripes with the two yarns. As I had quite a large amount of Elderberries I decided to have a go at dyeing this pink raw silk fabric I had lying around. I like the colour it turned out but I did make one mistake though. I learned later that when dyeing silk you shouldn't boil it as silk goes hard when it reaches higher temperatures. My piece of silk did go slightly hard but nevermind. I still used the silk piece to sew myself the Bubbly Berry Skirt which you can see on my blog 'Grey Duckling'.

[caption id="attachment_2528" align="aligncenter" width="500" caption="Before and after dyeing raw silk with Elderberry"]Before and after dyeing raw silk with Elderberry[/caption]

The images in this post are copyright of Eddie Roued-Cunliffe. You are hereby granted permission to use them for non-commercial purposes as long as you credit Eddie and link back to this page. If you are using them and talking about this post I would love to hear from you in the comments.

Thursday, 23 September 2010

Dyeing with Blackberries

Blackberries are in season at the moment and we have quite a few in our garden. I have already used the best ones for Blackberry Jelly. After being inspired by the Hampshire Weavers, Spinners and Dyers Guild Exhibition, I decided to go home and give natural dyeing a try.

I picked as many blackberries as I could find (there were not many left). Not being very well prepared I didn't have a mordant, but I read the 'Making Natural Dyes from Plants' tutorial, which mentioned that you could use a salt fixative for berry dyes.

I made a mixture of 16 parts water and 1 part sea salt. I then put the yarn into the mixture and brought it to a boil. When it began to boil I turned the heat of and left it to rest in the salt water for 1 hour. I then gave the yarn a rinse and began to prepare the dye soup.

I added the blackberries to some water (c. 1 part berries and 4 parts water). I cooked the mixture for about 30 min after which I removed the pot from the heat and mashed the berries. I then let the mixture boil for another 30 min after which I strained the pump carefully. When there was no more pulp in the juice I put it back on the stove and added the pre-prepared yarn. I brought this to a boil again, turned of the heat and left it to stand till the next morning.

Next day I pulled the yarn out of the dye soup and gave it a good rinse, adding a splash of vinegar to one of the rinse baths. I then hung it to dry and used the end of my wooden spoon as a nostepinne to wind it into a neat ball.

[caption id="attachment_2367" align="aligncenter" width="476" caption="Ball of yarn dyed with Blackberries"][/caption]

I would like to note that a couple of weeks later I made a little tester by putting a strand of this yarn in the window for a week or so. It faded and became a more yellowish version of the original colour. Never having tried dyeing with a mordant like Alum I don't know what level of fading you would expect if you put your dyed item in the sun for a week. But I don't think you will ever expect it not to fade at all. Would be fun to experiment with. If anyone else has any experience with this I would love to hear your comment

The images in this post are copyright of Eddie Roued-Cunliffe. You are hereby granted permission to use them for non-commercial purposes as long as you credit Eddie and link back to this page. If you are using them and talking about this post I would love to hear from you in the comments.

Sunday, 5 September 2010

Preparing Wool

This summer I bought the fleece of a Jacobs sheep called Joy. The image below is not of Joy herself but of a similar Jacobs ewe. I wanted to spin the fleece on my Grandmothers spinning wheel. But I won't have access to it before next year. In the mean time I wanted to wash the fleece and sort it so that it would still be nice in a years time. I understand that there is an argument for keeping lanolin in the fleece. When I was a baby my Grandmother knitted some cloth diaper covers from wool she had spun. For this wool she wanted very much to keep the lanolin in as it made the covers water resistant. My mother even used some special lanolin soap when washing them to keep as much lanolin as possible.


However in this case I want to remove the lanolin. The first reason is that when keeping it lying around for a year I have understood that the lanolin may begin to harden. The other reason is that I want to make a nice-wear jumper for my husband out of it. If I was making a work sweater for him I would keep the lanolin so that it is water resistant.


So how do you go about washing and removing lanolin from a fleece. It's all about high temperatures and minimal abrasion. I have used the following tutorials: Washing Raw Wool by Holly Shaltz and Washing Fleece by Fuzzy Galore. If you want to try this out for your self I would suggest reading these two tutorials. But I would like to share my experience with you first.


  • Not having a top loading washing machine I was forces to use a couple of buckets. I turned the water boiler on and used the kettle to get warm enough temperatures. My thermometer became my best friend.

  • I first lowered the fleece into the water in some washing nets. But I found that the water did not get through the fleece that way. So I began to dunk the fleece into the buckets without the net.

  • I wash using about 5 buckets of water. The first with lots of dish washing liquid and water at 70 degrees Celsius. The second with a bit of dish washing liquid (I used Ecover) and 60 degree Celsius water. The third and fourth with just water at 50 degrees and the last at 40 degrees.

  • I found another use for the lingerie nets I bought. I put a bit of the fleece in a net and swung it out in the garden like you would with a salad bag. It was a great way of getting the water out of the fleece without abrasion.

  • I then laid the fleece out to dry on an old towel and turned it once in a while. It took on average 24-48 hours to dry through.

Tuesday, 10 August 2010

Cecile’s best spinning tutorials

Hand spinner Cecile has recently learnt the craft of spinning on a drop spindle. From where you might ask. Well I think she started of learning the basics form her knitting group but the rest she has found out through online tutorials. We asked her if she would share her best online tutorials with us. So here they are:

Spindling basics:

[caption id="attachment_2095" align="alignright" width="225" caption="CD Drop Spindle"][/caption]

A very clear series of video from Abby Franquemont, author of the remarkable Respect the Spindle.
Part 1: To get started on the spindle there is ‘Introduction to Spinning: Part 1’, which explains the staple length, drafting, starting the spindle (high/top whorl), spinning, walking the yarn to keep the tension when winding it on the spindle, ‘park and draft’ and more.
Part 2: Moving beyond ‘park and draft’ ‘Introduction to Spinning: Part 2’ gives an overview of the most common problems encountered when trying to progress beyond the ‘park and draft’ method: spindle backspinning, yarn breaking, how to judge the right amount of twist, joining a new batch of fibers, woolen vs worsted drafting, how to secure your spindle once you want to stop (you will eventually need to!).

From Megan LaCore we have a slightly different approach, with clear short videos to illustrate specific parts of the spinning process:
If you are having problems spinning and drafting at the same time ‘Drafting Wool for Spinning’ shows you how to pre-draft the yarn first.
Spinning on a Drop Spindle’ shows you how to then spin it and finally ‘Plying Two Single Yarns on a Drop Spindle’ shows you how to ply it (2-ply).

Alternative plying techniques:

In ‘Andean Plying’ Megan LaCore demonstrates how to create an Andean bracelet, to ply together the two ends of the same cop/ball of yarn.

Finally I have discovered this very interesting technique, illustrated by Rosemary Knits, to do a Navajo ply (3-ply) ‘on the fly’, which means, plying the singles as you spin them.
It looks like a very long post, and you can go right down to the video at the bottom, but if you’re interested in trying the techniques, the edits are well worth reading as Rosemary has tweaked the technique to make it more efficient. This is one of my favorite techniques, as it means no kinky singles to deal with, just spin a bit, ply a bit, spin a bit, ply a bit, and so on and so forth…

The images in this post are copyright of Eddie Roued-Cunliffe. You are hereby granted permission to use them for non-commercial purposes as long as you credit Eddie and link back to this page. If you are using them and talking about this post I would love to hear from you in the comments.

Thursday, 5 August 2010

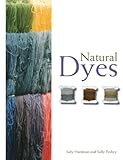
Review: Natural Dyes

[amazon ISBN=1847971008][/amazon][amazon ISBN=1847971008]Natural Dyes[/amazon]
By Judy Hardman and Sally Pinhey, 2009
ISBN: 978-1-84797-100-5

By Louise Schelde Jensen

I have been dyeing with plants and other natural materials for about three years now, and have gained experience with different types of plants and the colours you can get out of them. I have also acquired the basic 'know-how' needed when dealing with wool, silks and plant materials.

[caption id="attachment_2102" align="alignleft" width="300" caption="Dyeing in a cauldron (copyright Louise)"][/caption]

Nonetheless, I always have a book or two with me in when I dye just to make sure I do things right and thereby get the best result. For a long time my books on the subject have (being Danish) been Danish books from the 1960s and 1970s and even though not much have changed in the experiments with dyeing it was a joy for me to discover that a new book on the subject had arrived on the marked. I was thrilled to be asked by Historic Crafts to read and do a review on the book. The review has been long time coming due to my new job as a full-time Viking at Bork Vikinge Harbour, Denmark. But the advantage of this is that I have now had the opportunity to try out some of the things mentioned in the book. I'm glad to say that this new book has become my new companion each time I put on a new cauldron with wool and plants.
The book is easy to read and the chapters are very well organized. It begins by listing the mordants. Then on to the different equipment that is needed when dying with plants – pots and pans, a thermometer, things to stir with and so on. This chapter also points out how important safety precautions are. The second chapter is about fabrics, how to prepare them for the dyes and the different ways of dying. One of the great things about this chapter is that the writers have been making experiments with light fastness and this is one of the questions that is often asked - how well does a colour bind to the fabric or yarn? It is very valuable information and a thing I have always wanted to try myself but have never got around to doing.

[caption id="attachment_2101" align="aligncenter" width="490" caption="Louise dyeing (copyright Louise)"][/caption]

The largest chapter consists of a great catalog of the many plants which can be used for natural dyeing. The authors have made a special system for the plants so that the book can be used as a kind of plant thesaurus, which in turn makes it handy when collecting plants and looking to dye in a certain colour. The 53 plants are mentioned in alphabetical order and by their most common names. Other names is also include as are the Latin name. The plant is then described on one page and illustrated in beautiful watercolor on the opposite page. Below the very interesting description of the cultural history of the plant you will find an image of a bobbin with different colour samples that can be achieved with this specific plant. The results of different mordants are displayed and also the differences between using the leaves, flowers, roots and other unique elements of this particular plant. This level of detail is fantastic and again the book is very easy to use. The many colour samples are lovely to look at and make for a great guide to the spectrum of colour that can be produced from natural dyes.
The last chapter brings a whole new element to the book that I have not yet seen in other books about plant dyeing – different guides to making your own dye plant gardens. As a woman with at passion for both crafts and the great outdoors, this sort of guides really makes me want to plant my own garden with plant for more organized experiments and projects.

[caption id="attachment_2103" align="aligncenter" width="405" caption="Louise's natural dyed yarn (copyright Louise)"][/caption]

The guides in the book can give help and inspiration to different types of gardens – front gardens, wet and dry gardens and container gardens. The projects are well described and drawings of the garden designs are attached. You can't help being inspired to grow your own garden from this.
All in all I'm very pleased with this new book about plant dyeing. It has a modern touch, is easy to read and use and I must say that it makes you want to dye. I would warmly recommend it for both museums shops, experienced dyers and newcomers to this type of craft. I have had much pleasure of it already and know that I will continue to do so.

The images in this post are copyright of Louise Schelde Jensen. If you wish to use the images please request permission from Louise.

Buy it on Amazon:
[amazon ISBN=1847971008][/amazon]

Friday, 30 July 2010

60 Years of Hampshire Guild of Weavers, Spinners and Dyers

Special article put together by Dawn Dunlop for the Hampshire Weavers, Spinners, and Dyers Guild's Jubilation Exhibition. The information in this article is collated from documents from  Hampshire WSD Guild Archives.

As a member of the Hampshire Guild of just 13 months, it has been very interesting looking through the archive at photographs, and slides and minutes books from the last 60 years. It certainly seems as though the guild has been very active over the years, and successful in bringing the skills to the public.
There has been involvement in many exhibitions since its early years and this is set to continue with the Jubilation exhibition in Winchester this year. The Guild has attended many shows too including the Romsey show for many years where members demonstrate their skills, display items they have made and introduce visitors to the world of weaving, spinning and dyeing. These shows are a great way to showcase the work of the Guild and its members.
Other major events over the years have included the Art for Everyone project (A4E), Fibre Fun and community events such as the dyeing day at Hawthorn Urban Wildlife Centre on Southampton Common. Another large project was the weaving of the Altar cloth for St Swithuns which will be on display at the exhibition in August.

[caption id="attachment_2108" align="aligncenter" width="498" caption="Woven Altar cloth for St Swithuns Church (from Hampshire WSD Guild Archives)"][/caption]

Hampshire Guild has great success in sharing their knowledge and skills within the community and especially with children who seem to love having a go at these crafts. Days such as A4E, fibre fun and the weaving afternoons at Hilliers have all been successful in introducing children to the crafts. The Guilds open day in September also attracts a good turn-out of members of the public. A real success story of Hampshire Guild has been the inception of the Junior Guild (see article later in newsletter), who meet in holidays and always seem to have so much fun learning from members of the Guild. The future certainly is bright and I personally look forward to being involved with the Guild for many years to come.
Dawn Dunlop, Guild Newsletter Editor

The day it all began, 15th July 1950


Many Weavers, Spinners and Dyers resided in Hampshire and an idea was born that a Hampshire Guild should be formed. Students from the Schools of Art in Winchester and Southampton were invited to an inaugural meeting at “Sandy Shoot” Burley, the home of Mrs Eileen Richards in the New Forest on July 15th 1950. In spite of the shocking weather, 31 attended the meeting bringing samples of weaving, spinning and dyeing.
Miss Hester Viney, Hon Sec of the Dorset Guild, brought messages of goodwill and assurances of help from the Guild. After some discussion a temporary committee was formed. Mrs Hodgson Chairman, Mrs E Richards Hon Sec, H.Thurston-Dale Hon Treasurer; Miss R Allen, Miss Aylivin County Art Advisor, Col A J Harris, Miss A Hendson, Mrs Hughes and Miss O Spencer-Smith. The subscription was 5/- per annum. The first meeting was held at the Southampton College of Art where Miss R Allen was Weaving Tutor, the second was held at Winchester School of Art and these were the venues for some time. Meetings were quarterly, and gradually membership increased and in 1952, at the AGM, Miss O Spencer-Smith was elected chairman and Mrs Ray Hon Sec.
1953 being Coronation Year, the Guild decided to have a four day Exhibition and Sale at the Southern County Show on Southsea Common. This was a great venture as little money was available, however a marquee was ordered and insurance arranged. Woven articles flooded in to the Selection Committee - stoles and scarves, lengths of tweed, cushion covers, table mats, bags and rugs. Weaving and Spinning demonstrations were arranged for stated times and a rota of Stewards drawn up for the four days. A week before the Show opened, a letter was received from the Duchess of Gloucesters Lady in Waiting stating the Duke and Duchess wished to visit the Exhibition. The Royal Visitors were very interested in the Exhibits and the spinning of flax by Miss Cox. The Duchess purchased a child’s skirt and accepted a knitting bag woven by a member of the Guild. The Duke and Duchess were received by Miss O Spencer-Smith and Brigadier Lucey who had served under the Duke.


Lady Cooper from Hursley was the Duchess’s Lady in Waiting, she was most interested in the exhibits and promised to return the next day, which she did and bought £100 worth of goods. The then Duke of Wellington was with the Duke of Gloucester and was most interested in the display of hand-woven tweeds. He asked me to put him in touch with a tweed weaver. I informed Miss O Spencer-Smith and she sent him some samples, he duly ordered tweed for three suits and wrote of his satisfaction in the material also that his tailor enjoyed making up such excellent cloth. The public were most interested in the demonstrations and Exhibits, at the end of the show the expenses were covered and a tired but happy Committee were glad the effort had been made.
Exhibitions and Sales were held at the Avenue Hall Southampton, the Romsey Show, Milner Hall Winchester, the New Forest Show and Southampton Show.
Gradually the membership declined. The School of Arts were no longer able to accommodate the Guild for meetings so a few were held at the Red Triangle Club Winchester and Portsmouth College of Art and the Winchester Centre.


[caption id="attachment_2106" align="aligncenter" width="500" caption="AGM Garden picture from the archive (from Hampshire WSD Guild Archives)"][/caption]


The AGM during Miss O Spencer-Smith regime was always held in her garden at High Mead Bursledon during June. It was a pleasant social occasion, after the business was finished, and the speaker also, tea was served by Burseldon WI. Miss O Spencer-Smith allowed members to visit her workroom in the garden.
Membership gradually increased and good work was done. The Guild was fortunate having Miss A Hindson, Miss Allen and Miss Aylivin who gave good advice and the Guild had a name of good work.


Words by Margaret Ray from the Guild Archives

Monday, 26 July 2010

How to Make a CD Spindle

If you have read "Portrait of a Hand Spinner" you will have read about Cecile's quest to make the perfect spindle. One of the first spindles she made herself was the CD spindle. Here are the instructions for the CD spindle drawn by Eddie. A very big thanks to Cecile for letting us in on how she did this. If you have any questions that are not answered in the how-to, feel free to comment them below and we will get Cecile to answer them for you.

The instructions are free to use under the Creative Commons License: CC-BY-NC-ND, which means that you are welcome to download, print, use and distribute this how-to for non-commercial reasons as long as you attribute it to Historic Crafts and don't make any changes to it.
Creative Commons Licence


Friday, 9 July 2010

Weavers, Spinners and Dyers Jubilations

This August the Hampshire Weavers, Spinners and Dyers (WSP) Guild are celebrating their 60th Anniversary with the exhibition "Jubilations" from the 17th-30th August (10.00-17.00) at the Great Hall in Winchester. Admission is free.
Come along and enjoy weaving, spinning and dyeing demonstrations, learn about the techniques and see what the members have created over the years.
The Historic Crafts Weaving, Spinning and Dyeing theme ends with this exhibition at the end of August.
Here is a look at other what other WSD guilds have come up with to celebrate their anniversaries:

The Shetland Guild of Spinners, Weavers, Knitters and Dyers did an open day for their 20th anniversary.
The Kent Guild of Spinners Dyers and Weavers all joined together to make a banner.
The Weavers Guild of Greater Baltimore's members together made 60 scarves and published it in a book, "Sixty Scarves for 60 Years" to celebrate their 60th anniversary.

Monday, 14 June 2010

Review (by Sue) Celtic, Viking and Anglo-Saxon Embroidery

The Art & Embroidery of Jan Messent: Celtic, Viking & Anglo-Saxon Embroidery
By Jan Messent
ISBN: 9781844484096

Review by Sue Bates

Jan Messant has many good books to her name but this is by far the greatest and glossiest. If you aren't reading snippets from it for your embroidery knowledge, it will rest invitingly on the coffee table.

Jan writes of her great interest in the histories of the work she has interpreted here, and her book has a background of historical facts. A tremendous amount of research has gone into each section of the book and it shows in each piece she makes.

Sometimes she produces finished work, but she admits to enjoying smaller sample sizes now.They are as illuminating as her completed works and give glimpses into methods that may have been historically viable. Her techniques are many-fold.

Jan insists it isn't a "how to" book, but there are hints throughout to enable the reader to do something similarly.

The book has eight sections with beautiful photography from beginning to end. There are many close-ups too, to add to the awareness of Jan's skill and colour sense.

There is an introduction of Jan to the reader after which she gives a brief historic survey of the Celts, Anglo-Saxons and Vikings that reveals her knowledge of the subject. The photographs included urge you to delve deeper into the book.

Then follows the stories and progressions of seven hand-made books. Each one is such a work of art that any embroiderer with a creative flair will be thinking through their stash, itching to get started.

The books are separate entities with contents coming from Celtic influences to the Domesday interpretation. They are full of rich textures and historical alliances.

Jan's previous books have incorporated many styles of embroidery, design and creative uses for all types of thread. She has taken all that forward to this work with great enthusiasm and talent.

I applaud it.

Want to know more about the book? Why not go and read Dee's review!
Comment and share your thoughts with Sue!


Thursday, 3 June 2010

The Nomadic Origin of Felt

By Ane Løser
Translated by Eddie Roued-Cunliffe

Humans are not known to have traveled alone through history but have instead been accompanied by loyal animal friends standing by our side. In exchange for protection and cover they have given us warmth and sustenance. The sheep is one of these comrades who has not just given us meat, milk and cheese, but also a fur that is useful in a variety of ways. The qualities of wool itself must wait to be covered another time as it would make for a long and interesting article in itself. However, one must admit that few materials have as many abilities as wool. It is simply a fantastic material. So the sheep deserve a thank you for this.

This article will on the other hand focus on one of the oldest processes known to humans. Felting: the process of using water, heat and movement to create a tightly felted weave. We do not know where felt originated but the process is old, probably older than spinning and is likely to have originated in a time where humans were still dressed in skin.

One of the many legends about how felt came about comes from the story of Noah's Ark from the Old Testament. Noah lined the ark with wool before the flood to avoid the animals being hurt during the voyage across the seas. After the dove brought back the olive branch and all the animals were safely on solid ground again, Noah went back into the ark. In there he saw that the animals had processed the wool with their claws and hooves and the humidity of their breath, and the wool had become felted pieces of fabric that Noah could use to make clothes for his family.

The oldest discoveries, Scythians and the Pazyryk grave
The oldest traces of domestic sheep goes back to 7000 BCE (9000 years ago). There may very well have been domesticated sheep before this time but we have no archaeological finds to support this. How the felting process was actually discovered noone knows either, but it is my belief that we were taught by the sheep themselves, as their backsides are often covered with the finest felt created naturally by a combination of the sheep own body heat, urine and malted wool.

The oldest texts that mention the craft of felting are from China, but there is reason to believe that felting originated as a process in the area stretching from Western China to the Southern Russian plains in connection with the Scythian culture. Felted material protects against sun and the cold and can be used for a lot of different things such as tents, clothing, saddles and covers for horses. In these regions felt was given a magic and even a religious meaning. If for example you wanted to do something good for another person or protect them against bad luck, you would place them on a white felt rug. Another example could be making dolls of felt that protected the household and livestock against evil and brought them luck.

The Scythians are one of the first known nomadic people and around year 700 BCE the Chinese called the region where they roamed, felt-land. Herodotus (Greece c. 500 CE) describes traveling caravans as felt tents on wheels. During excavations of the prince grave of Pazyryk in the Altai Mountains from the year 300 BCE, about 2500 beautiful felt pieces were discovered. Most of these had been preserved well because of the permafrost in the area. The material consisted of tents, socks, ritual dolls, head decorations for horses, felt saddles with inlaid gold leaf and much more. From this material we see that the people who created these things in the cold maintains area were real artists that knew their craft to perfection. With abilities this advanced at this time, the technique of felting must have been around for quite a while in this region. Even today both Inner and Outer Mongolian tribes use felt tents, the so-called "Ger". "Yurt" which is the word mostly used for these tents is actually just the spot on which the "Ger" was erected. Today both the wooden frame and the felt cover is likely to be factory produced.

China: Middle Ages and manufacture
When felting via the Scythians became known in China, the empire did not count it for much. As the material became better known and the quality improved it was carried into the emperors palace as large carpets with silk embroidery and was thus elevated from being an everyday object to something luxurious. Many hundred years later China was in the forefront of felt manufacturing and in 1262 CE employed 29,000 people in this sector, which is quite a few when you put it into perspective of the time. In China felting became even more luxurious, not just by adding embroidery to it but also by lining it with silk which strengthened the material and gave an even more beautiful result.

Felt and freedom in the Antique
In my part of the world, Europe, felt was first mentioned in literature in Homer's Illiad (which is thought to have been written around 600 BCE). Here Odysseus wears a helmet of skin covered with felt. Later in the Roman empire felt became a sign of freedom. If a Roman slave was freed he was shaved and given a special felted cap, a pilleum libertatis, that showed his new status. Pilleum means felt cap and libertatis means freedom, so the cap was simply a felted freedom cap.

The oldest known image of the felting process comes from the town of Pompeii, settled in the 7th century BCE and covered in ashes from the volcano Vesuvius in 79 CE. In this great trade center c. 15-20,000 people were engaged in the textile industry, which covered felters, weavers and fullers. Fullers are also thought to have had great influence in the town's political life.

Discoveries from Northern Europe
Northern Europe does not have many discoveries of felt objects in archaeology because of soil conditions which degrade wool quite easily. But there are some. From Hordaland in Norway we have the oldest find, two felt fragments from the 6th century CE wrapped around a couple of burned bones in a bronze urn. The most noticeable discovery is a felt mask found in one of the ships from Haithabu's harbour (Slesvig, Germany). This mask was kept so well-preserved because before it went down with the ship it had been prepared with tar. This half-mask is brown (dyed with walnut), has pointed ears and looks most of all like a bull with a hole for the nose and two holes 6 cm apart for the eyes. The distance between the eyes fit the proportions of a human which can indicate that the mask was worn by a human, maybe as a part of a ritual.

From these latest centuries not much felt has survived either. Sweden, where there has been no archaeological discovery of felt yet, has on the other hand an unbroken, very living tradition of felting (mostly in the northern regions) which we do not find further south. Even so, in Denmark a special discovery from the 19th century shows that felt is used and at that for one of the most important things in a Samsø fisherman's life. The discovery from Samsø (a Danish island) consists of a felted bag for filtering the fisherman's snaps.

References:
Damgaard, A. 1994. Filt, Kunst, Teknik, Historie. Hovedland. (ISBN: 9788777391859)

Ågren, K. 1977. Tovning: om at lave filt af uld til sokker, vanter, huer og mange andre ting. Thaning og Appel. (ISBN: 9788741360829

Østergaard, E. 2003. Som syet til Jorden. Århus Universitetsforlag: Århus (ISBN: 9788772889344)

What are you saying with that Flower?

By Ingrid Murnane

[caption id="attachment_2628" align="aligncenter" width="459" caption="Flower brooch, copyright Ingrid Murnane"][/caption]

Spring is in the offing and will be here before you know it! After the catkins and the leaf buds comes the best bit: the flowers. But did you know that by giving and recieving flowers you may be making a statement that you weren't aware of? A declaration of forbidden love, or the capturing of souls in the afterlife, to name but a couple.
Historically plants and flowers have been associated with gods and goddesses and used in rituals for healing and love potions; protection and prosperity alike. Still used in Wiccan practice, many of these correspondences also survive elsewhere: for instance flowers decorate Christian churches and at times such as Harvest Festival the fruits of the land are placed on and around the altar.

On the death of a person, many people today will send a flower basket or wreath. Traditionally floral wreaths were intended to enclose the soul of the deceased and to prevent it coming back to haunt the living. Three year old Greek children were also traditionally bedecked with flowers at the Spring Equinox to recognise their reaching childhood safely without illness taking them. In Switzerland, the customs of crowning children with the crocus flower was said to ward off evil and illness too.

Some flower rituals are still carried out today. In many hospitals, red and white flowers are never mixed within the same vase in case of a death on the ward. Equally, today's brides might have a sprig of orange blossom in their bouquets in hopes for a marriage with children, but the former favourites rosemary and myrtle have fallen out of favour. In an interesting twist, the wallflower, now the term for someone so shy that they don't want to join in, previously was a symbol of a knight's faithfulness when away at war. And really, did you know that chicory can make you invisible?!

According to British pre-Victorian tradition, there was a flower for each month of the year, but the language of flowers really developed during the highly conservative period of the Victorian era. The Victorians were strongly restricted by the rules of etiquette when it was considered totally inappropriate to express feelings of love or affection. The language of flowers evolved when a meaning was assigned to specific flower by which means a lover could send flowers which conveyed a hidden romantic message. Some of the most popular flowers used were as follows, although the full list extends to around a hundred!

Bluebells meant faithfulness, buttercups radiance, camellias showed loveliness, the crocus meant happiness. A white carnation denoted purity of affection, but a red one meant the full, fiery passion of love! Daffodils could mean both shyness and diffidence, whereas dahlias or red, white or yellow showed a potential suitor a rebuff, dismissal or real distaste, respectively. To delay a meeting, Victorians sent a daisy, but for a goodbye, only a Michaelmas daisy would do. For remembrance whilst apart there was, of course, the forget-me-not, but watch out if you were sent a foxglove because this meant that your love thought you shallow. A gardenia showed sweetness and an iris ardour. Honeysuckle could be sent as a confirmation of betrothal, or lavender as a refusal of such (probably resulting in you getting sent some gladioli back as a sign of pain and upset.) Traditionally lilies were the sign of purity, but a tiger lily showed passion and the magnolia, strength. A morning glory flower denoted affection, but nothing more. A red poppy asked a suitor to be patient and to exercise moderation and a white poppy meant indecision. As today, the red rose meant 'I love you with all my heart', but the white rose showed a refusal of the affection and a yellow rose that the affection was misplaced. A sunflower was sent when a lady thought her gentleman was being too showy with his affections, whereas sweet peas approved of his tenderness. Lastly tulips were sent when a clear message was needed: red for a declaration of love, but yellow for refusal.

Combinations of flowers and plants could send a very particular message, which could be as specific as the time of day. A combination of ivy and buttercup denoted that a lady wished to tell her suitor 'I will meet you tomorrow, but cannot see you before ten.' There must have been a lot to learn in order to make sure the message was read correctly!

Growing or buying flowers is all very well, but we're crafty people here. Why not knit your own brooch with its hidden meaning? Whether you'd like to be showing your strength, or making a statement of ardour with an iris, there is a pattern out there for you.

Here are some good links for making your own daffodils, camellias, lilies, gardenias and morning glories.

For a more generic flower, that you could alter to fit your needs, this pattern is good.

If you really get into knitting and crocheting your own flowers, there are some great books available.

Nicky Epstein's Crocheted Flowers and Knitted Flowers by Susie Johns are good ones to start with as they both have a wide range of flower types to make.

And if they aren't quite what you want, why not experiment with freeform knitting and crochet to make the shapes that you would like instead. Just watch out for the message that you might be sending!

The images in this post are copyright of Ingrid Murnane. If you wish to use the images please request permission from Ingrid.

References

Arcarti, Krystina. 1997. Language of Flowers: a beginners guide. Hodder & Stoughton (ISBN: 978-0340697818)

Fanshawe, Simon. 2005. The Done Thing. Century. (ISBN: 978-1844138739)

Greenaway, Kate. 2003. The Language of Flowers. Dover Publications Inc. (ISBN: 978-0486273723)

A Tale of Knitting

By Helene Agerskov Madsen


Knitting is probably the single most well-known craft technique today. Furthermore, knitting has received an immense renewal of interest over the last years with numerous knitting books being published and the establishment of knitting groups, societies and guilds. Nevertheless, it would probably be useful first to agree on what is meant by knitting: it can be defined as needlework created by interlacing a single thread in a series of connected loops using two or more straight eyeless needles. Other techniques of a similar nature are sprang, knotless netting (i.e. nalbinding) and crocheting. Likely predecessors of the needles known today are knitting frames and the earliest needles are known to have a notch in one end and a point in the other. Just like the knitting needles still in use today in the Balkans and South America and very much like our modern crochet needles.
Speaking of knitting versus crochet, an amusing Finnish country proverb is supposed to say: “He who wears knitted mittens has an unskilled wife”. This is from a time when both techniques were in use but knitting was obviously looked down upon, because the alternative, knotless netting (i.e. nalebinding) was more time consuming and demanded greater nimbleness of the left-hand fingers. But let us not dwell more on this rivalry as it bears too close similarity to the rivalry between knitting and crochet (though the enlightened reader will appreciate each technique for its specific qualities in different situations).
Continuing with the tale of knitting needles, the introduction of four or five needles instead of only two occurred around the 13th century.

Textile preservation
When studying the history of knitting, focus has often been on preserved artifacts kept in museum collections. There has been some great discussions as to which techniques were used to produce the individual artifacts and which relic can be described as the earliest example of knitting. The final product of knitting and knotless netting (i.e. nalbinding) is very similar when preservation over centuries is taken into account, and distinction between the two techniques often requires microscopic examination. Also a word of caution – textiles deteriorate at a scarily fast speed, and textiles more than a couple of centuries old are small wonders just for being preserved.

The introduction of knitting
Knitting was possibly performed in the Middle East as early as the first century CE and one theory of the spread to Europe is that the Arabs learned to knit after conquering Egypt. Later they brought it with them when conquering Spain in the 8th century. It wasn’t until the Middle Ages that the technique began to spread and gain popularity in Northern Europe. In France we have a great number of hats that were knitted in the 14th century. It is also from France we have documentation of the earliest establishment of a knitter’s guild in Paris in 1366. The growing popularity and demand for knitted garments occurred in the 14th-15th centuries and numerous guilds were formed in Western and Central Europe. In the Middle Ages a guild was a powerful union of craftsmen of a particular trade, established to improve the quality of the profession. The system had a structured apprentice system and was exclusively male.
Influenced by Spanish trend, knitted stockings became highly fashionable in Northern Europe in the 16th century. The upper parts of society had previously worn stockings made of woven textile but now fashion dictated tight fitting, knitted silk stockings to show of the legs. It was only later the lower parts of society copied the trendy stockings, but in wool.

Monastic knitting
Knitting also became popular in the monastic world and liturgical gloves knitted of wool or silk with gold or silver embroidery are often amoung preserved textiles from the Middle Ages. Nuns from the abundant monasteries across Europe knitted these gloves. Knitting also made an imprint on artists of the time and several paintings from the 14th century depict a knitting Virgin Mary. She is often knitting with several needles and this implies that this technique was quite well known and understood by both artists and patrons.
Much later in history knitting became industrialised, but that is another story.

Knitting from a gender perspective
Historically knitting can be seen to follow two separated paths: one for private use and one for the commercial market. Nevertheless,  the paths are sometimes interconnected when for example knitted garments are sold as a side income.
As previously mentioned the knitting guilds were strictly male and men as a gender came to dominate the market for knitted garments. A practice carried through to the industrialisation when knitting machines arrived on the scene. However, in private both men and women seem to have practiced the technique until quite recently, when it became an almost exclusively female activity. Today a knitting man is something of a rare sight, but until the beginning of the last century it was considered a normal and very practical skill carried out by both men and women. Knitting was something you could do in many situations, even when walking or herding animals. In this fashion you also gained maximum benefit of your waking hours – so you might think of this and bring out your needles next time your waiting for a train. And you might want to poke your man as well.

Literature
Nielsen, Ann Møller. 1985. Pregle, Binde og Lænke: Gammel Dansk Strikketradition. (ISBN: 87-981522-0-3).

Nielsen, Ann Møller. 1988. Alverdens Strikning: Historie og Teknik. Ariadne. (ISBN: 87-981522-1-1)

Turnau, Irena. 1991. History of Knitting before Mass Production. AKCENT: Warszawa. (ISBN: 83-900213-2-3 )

Tuesday, 1 June 2010

Review (by Dee): Celtic, Viking and Anglo-Saxon Embroidery

The Art & Embroidery of Jan Messent: Celtic, Viking & Anglo-Saxon Embroidery
By Jan Messent
ISBN: 9781844484096

Review by Dee Westwood

On first sight this beautifully presented book is immediately compelling, as I began reading, and admiring the wonderfully composed photographic evidence and craftsmanship which is literally poured across the pages. At once Messent entices you into her world, enraptures and captures you in her recollection of Wartime Britain & her early life, where she describes herself as a small child gazing in wonderment at the array of brightly coloured threads, buttons & ribbons in a local haberdashery store.

Having scant knowledge of embroidery and all it’s intricacies I became fascinated by the insightful way Messent, using her sample books (to create textural examples), her historical research (which painted a vivid picture in my mind), and also the inclusion of various written references taken from the wills and records that survive, brought to life the people of early Britain and in particular the women who would have produced such exquisite and skilled work and the value that was placed upon those with such knowledge.

Messent makes no apologies for the inclusion of her own ideas of various small articles such women may have made or used in their daily lives. Indeed the very purpose of this book is to celebrate these ideas and it certainly succeeds in holding one’s attention, allowing the reader an understanding, and the freedom to explore what might have been, based on sound historical fact and Messent’s vast experience, which lend these very articles the possibility of authenticity.

There are examples of designs taken from surviving drawings and paintings which often reveal the methods used to create various garments and accessories which would have been much venerated and admired works, but which sadly rarely survive the ravages of time, particularly in England’s climate.

I am left truly mesmerized by the huge scope of possibility embroidery opens up for today’s needlewomen and crafters, whilst always drawing on our rich heritage and the ancient skills formed within our past.

A delightful, informative book which encourages exploration and experimentation together with a depth of appreciation of our history in textiles and the people of ancient Britain.

Have you also read the book and do you agree with Dee? Or do you know Messent's work? Comment and share your thoughts!


Wednesday, 26 May 2010

Dyeing with Beetles

You learn something new every day, I guess. But I was not prepared for this. Did you know that you can dye naturally with beetles? I did not! I wonder if there are other animals / insects that you can dye naturally with. Do comment if you know of any.

If you want to learn more about dyeing with beetles you should have a read on Ilana's blog to see what a trip to Lanzarote inspired.